How to paint new plaster
Painting a newly plastered wall requires more preparation than painting a normal wall.
You can’t start painting new plaster directly and instead have to take steps to seal the plaster so you can get the colourful finish you want.
Tools & Materials
Here is the list of tools and materials you will need to paint onto a newly plastered wall:
- Dust Sheets
- Painter’s Tape
- Step Ladder
- Roller & Tray
- Angled brush for edges & corners
- Sponge or cloth
- Sandpaper
- Mist Coat Paint
- Water (for mixing your mist coat )
- Topcoat Paint
- Primer/Sealer
How to Paint New Plaster: Step-by-Step Guide
Follow our step-by-step guide below to paint your newly plastered wall like a professional:
Step 1: Allow the Plaster to Dry
The first thing you need to do when painting new plaster is to let it dry. A week should be long enough to let it completely dry out and for all damp patches to disappear.
Once the plaster is dry it should be light with no dark spots and a consistent colour and appearance throughout. Your plaster will dry quicker with a heater or if you open a window.
While the plaster is drying, put down dust sheets and use your tape to protect any fixtures and fittings – applying a mist coat can be very messy!
Why does the plaster need to be dry?
Applying emulsion to wet plaster means that it may not bond properly and you could find that it peels off your wall. Painting on dried plaster can also cause the paint to dry very fast, leaving you with irregular brush strokes and an uneven finish. So to combat this, you will need to apply a mist coat before painting.
Step 2: Apply a Mist Coat
What is a mist coat and why is it needed? A mist coat is made of watered-down emulsion paint and acts as a primer. The extra moisture gives the wall something to absorb so your topcoat should stick. To make your own mist coat, mix three parts emulsion with one part water. You should always check the paint tin for the manufacturer’s instructions as ratios can vary. You don’t have to use exactly the same paint you’ve chosen for the final topcoat but you should use a similar colour for an even finish.
Alternatively, you can use a water-based primer which saves you the mess of making a mist coat. Our Valspar Universal Primer & Undercoat is water-based and will help you achieve a smooth and durable finish.
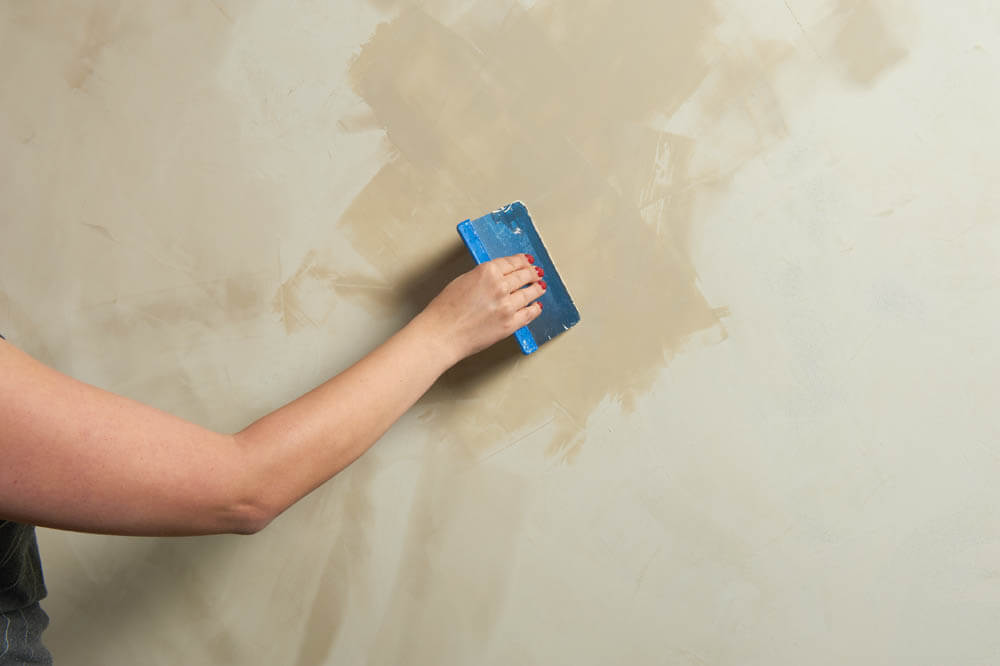
To apply the primer or mist coat, start by using an angled brush to paint around the edges, corners and any awkward areas of the room that a roller can’t reach. Then load your roller with an even coating of primer and apply it on the wall in long, even strokes. Alternatively, you could apply your product with a paintbrush - this might take much longer, but could minimise dripping - especially if you are using the mist coat option.
Wait 24 hours for your primer or mist coat to dry before you apply the topcoat.
Step 3: Apply the topcoat
As soon as your primer or mist coat has dried you can paint your wall normally.
For the best results, you may need to apply more than one coat.
Check out our complete guide on How to Paint a Wall
Practical Prep Tips: How to Check Moisture Levels in New Plaster
What you need:
- Clear plastic sheet or cling film
- Painter’s tape
What to do:
Step 1: Cut a piece of plastic sheet or cling film roughly 1ft x 1ft (30cm x 30cm).
Step 2: Tape it flat with Painters Tape onto the plaster wall, sealing all edges.
Step 3: Leave it for 24 hours.
Step 4: Check underneath the plastic the next day: If you see condensation or the plaster feels damp, it’s not fully dry. If it’s dry and clear, the wall is likely ready to prime or paint.
What is the best paint for new plaster?
You might be wondering “Can I use any paint on new plaster?” or “What’s the best paint for new plaster?”. The answer is that once you’ve finished the drying and priming stages of your decorating job, you can use our Valspar Walls & Ceilings Paint, just the same as you would with any other wall or ceiling. Here’s a selection of our suitable paints in more detail:
Valspar Premium Walls & Ceilings Paint
Featuring a primer, paint and topcoat all in one, our Premium Walls & Ceiling Paint is the perfect product for a swift and efficient job. It’s not only fast and efficient, but it’s also superior in quality and safety. It’s low VOC so you can be confident it’s the kindest paint for your household. Plus, it’s available in either a Matt, Mid-Sheen or Silk finish, with over 2.2 million colour options available to match to!
Valspar Classic Walls & Ceilings Paint
Our Classic Walls & Ceilings Paint is a staple option for great-looking walls and ceilings. It’s versatile, scrubbable and stain-resistant, and can be matched to over 2.2 million colour options in a matt or silk finish.
Valspar Premium Walls & Ceilings Pure Brilliant White
If you’re looking for a fresh, crisp white finish, then opt for our Premium Walls & Ceilings Pure Brilliant White. The water-based formula offers a quick-drying, splatter-free finish with fantastic coverage and long-lasting results for interior walls and ceilings.
What’s Next?
Check out our other handy How To Guides for helpful tips and advice on perfecting your DIY tasks at home:


